How to Change Video Dimensions for Any Social Media Platform
Other

Getting your video’s dimensions right seems small but makes a huge difference. It’s more than just dodging awkward black bars; it’s about making your content feel native to the platform, which is the secret to stopping the scroll.
This means adjusting both the aspect ratio (its shape) and the resolution (its detail) to make sure your video looks polished and grabs attention from the first frame.
Why You Can't Ignore Video Dimensions
Ever spent hours perfecting a YouTube video, only to upload it to your Instagram Story and watch it get horribly cropped? It’s a classic creator mistake. And it’s not just a minor visual hiccup—it’s a major roadblock to getting people to actually watch.
In a world where every second of attention is earned, content that looks out of place is the fastest way to get swiped away.
Knowing how to change your video’s dimensions isn’t just a technical skill; it’s a core part of your content strategy. Each social platform is its own unique world. A wide, cinematic 16:9 video feels completely natural on YouTube, but that same format on a vertical-first platform like TikTok just screams "I didn't bother to reformat this."
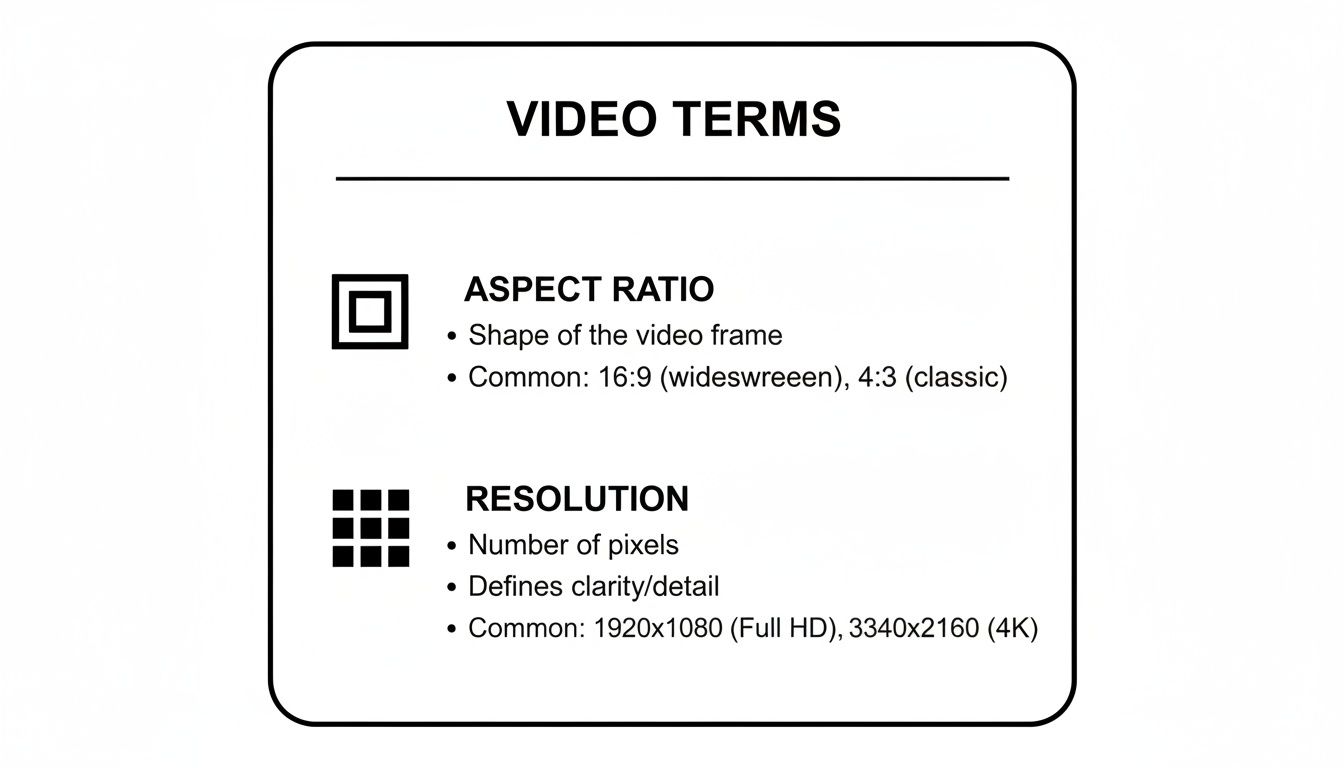
Aspect Ratio vs. Resolution: What’s the Difference?
Before we jump into the "how-to," let’s clear up two terms that often get mixed up but mean very different things.
Understanding the nuts and bolts of video dimensions can feel a bit technical, but it’s simpler than it sounds. Here’s a quick breakdown of what you really need to know before you start resizing your content.
TermWhat It Means for Your VideoWhy It Matters for Social Media
Aspect Ratio
The shape of your video frame, shown as a width-to-height ratio (e.g., 16:9, 9:16).
Each platform prefers a specific shape. A vertical 9:16 video fills the screen on TikTok, while a 16:9 widescreen format is standard for YouTube.
Resolution
The number of pixels that make up the video image, which determines its clarity and detail.
Higher resolution (like 1080p or 4K) means a sharper, cleaner look. Low-res videos look blurry and unprofessional, especially on larger screens.
Getting both right is the secret sauce for making your videos look polished and professional. A video can have a stunningly high resolution, but if the aspect ratio is wrong for the platform, it’s still going to look amateur.
Actionable Insight: Always match the aspect ratio to the platform and keep the resolution as high as possible. This one rule will solve 90% of your formatting issues.
This isn't just a "nice-to-have" anymore. The global video streaming market is on a massive growth trajectory, projected to jump from $246.9 billion in 2025 to $787 billion by 2035. This boom, detailed in a report by Future Market Insights , is fueled by people watching content across dozens of different devices and platforms.
Ultimately, mastering your video dimensions is about respecting your audience’s experience. When your video fits perfectly in their feed, it feels more authentic and is way more likely to be watched, liked, and shared.
Getting Your Video Dimensions Right for Every Social Platform
Ever tried to post a slick, wide-screen video to Instagram Stories, only to have it awkwardly cropped with massive black bars? It’s like showing up to a party in the wrong outfit—it just doesn't fit.
Getting your video dimensions right isn't just about looking professional; it's about claiming as much screen real estate as you possibly can. The more of the screen your video fills, especially on a phone, the more immersive it feels. That's how you stop the scroll.
Before we jump into the specific sizes for each platform, let's quickly clear up two terms you'll see everywhere: aspect ratio and resolution.
Think of it this way: aspect ratio is the shape of your video, while resolution is the detail packed into that shape. To really make your content pop, you need to get both right.
Social Media Video Dimensions Cheat Sheet
Things change fast in the social media world, so keeping track of the latest specs can feel like a full-time job. To make it easier, here’s a quick-reference table with the most up-to-date recommendations for all the major players.
PlatformPlacementRecommended Aspect RatioRecommended Resolution (Pixels)
TikTok
In-Feed
9:16
1080x1920
Reels & Stories
9:16
1080x1920
Feed Post (Video)
4:5 (or 1:1)
1080x1350 (or 1080x1080)
YouTube
Standard Video
16:9
1920x1080 (or 3840x2160)
YouTube
Shorts
9:16
1080x1920
Feed & Stories
9:16
1080x1920
In-Feed
4:5 (or 1:1)
1080x1350 (or 1080x1080)
X (Twitter)
In-Feed
1:1 (or 16:9)
1200x1200 (or 1920x1080)
Bookmark this page or save this table. Trust me, it’ll save you a ton of headaches later when you're rushing to get a post out.
The Undisputed King: Vertical Video (9:16)
There's no getting around it—vertical video is king. For platforms built around the mobile experience like TikTok, Instagram Reels, and YouTube Shorts, the 9:16 aspect ratio is non-negotiable.
This format fills the entire phone screen, creating a totally immersive view that hooks your audience and keeps them locked in. For the best quality, you'll always want to aim for a resolution of 1080x1920 pixels.
And it's not just a trend; it's a fundamental shift in how people consume content. In fact, uploads in vertical HD (1080x1920) have jumped by a massive 51% in the last year alone. People are voting with their thumbs, and they're choosing vertical. If you need a deep dive, this Instagram Reels format guide is a great resource for getting the nitty-gritty details right.
Actionable Insight: When you create for vertical-first, you're not just resizing a video; you're speaking the native language of the platform. It instantly signals that your content belongs there.
How to Handle Other Platforms
While 9:16 dominates short-form, a one-size-fits-all approach will hurt your performance elsewhere. Here’s how to adapt your content for other key platforms.
- For YouTube (the OG): Your traditional, long-form YouTube videos still live and breathe in the classic 16:9 landscape format. For quality, 1920x1080 pixels (1080p) should be your minimum, but pushing to 3840x2160 pixels (4K) will make you stand out.
- For Facebook and LinkedIn Feeds: These platforms are a bit more of a middle ground. While they accept 16:9, videos that are either square (1:1, like 1080x1080 pixels) or slightly vertical (4:5, like 1080x1350 pixels) tend to perform much better. Why? They simply take up more space in the feed as users scroll, grabbing more attention without forcing them to turn their phone sideways.
Choosing the right dimensions isn't just a technical step. It’s a strategic one. It ensures your video looks its best and gets a quiet nod of approval from the platform’s algorithm, which almost always favors content that delivers a great user experience.
Hands-On Methods for Changing Video Dimensions
Knowing the right dimensions is one thing, but actually changing them is where the work begins. If you want precise control over every single pixel, then traditional video editing software is your best bet.
Let’s dive into the manual methods for resizing your videos, giving you the power to crop, scale, and export your footage perfectly every time.
Changing Dimensions in Professional NLEs
Professional non-linear editors (NLEs) like Adobe Premiere Pro and Final Cut Pro offer the most robust toolkits you can find. They provide granular control, which is absolutely essential for high-quality results—especially when you’re trying to turn a wide 16:9 video into a vertical 9:16 format for TikTok or Reels.
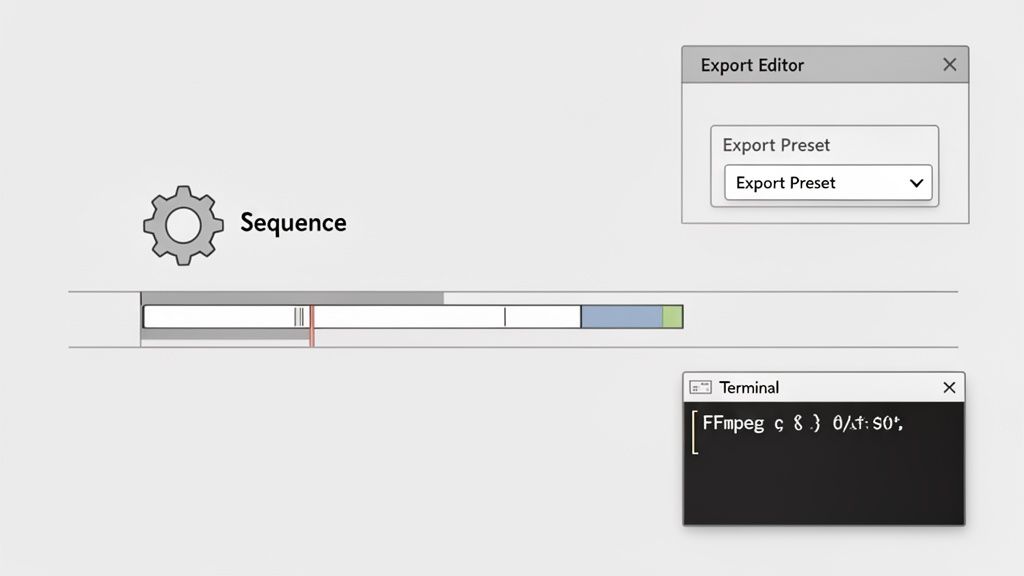
The workflow usually involves two key stages: first, you adjust your project or sequence settings, and then you configure your export presets.
- Adobe Premiere Pro: The first thing you'll do is create a new sequence (File > New > Sequence). In the settings tab, you can manually type in your target dimensions, like 1080x1920 for a vertical video. Once you drop your footage onto the timeline, you’ll have to manually adjust its position and scale in the Effect Controls panel to make sure your subject stays in the frame.
- Final Cut Pro: Here, you'll create a new project (File > New > Project) and just select "Vertical" under the Video Format settings. This automatically sets up a 9:16 timeline for you. From there, you'll still need to reframe your clips using the Transform tools in the Inspector to perfect the composition.
Actionable Insight: The real work isn't just changing numbers in a settings box. It's the creative task of reframing the shot to tell the same story within a completely different shape.
Quick and Easy Online Video Editors
Let's be honest, not everyone needs a full-blown professional editing suite just for a simple resize. For quick, one-off tasks, online video editors are a fantastic solution. These browser-based tools have simplified interfaces that let you upload a clip, pick a new aspect ratio, and download the finished product in minutes.
Many of these platforms come with pre-made templates for popular social media formats, which takes all the guesswork out of picking the right dimensions. If you're looking for a fast and user-friendly option, you can resize videos with a simple tool that makes this whole process much easier. It's the perfect approach for social media managers or small business owners who need to quickly adapt a single video for different platforms without getting bogged down in complex software.
The Technical Route with FFmpeg
For those who are comfortable with the command line, FFmpeg is an incredibly powerful—and completely free—open-source tool. It can handle just about any video-related task you can throw at it, including changing video dimensions with a single command. It's actually the engine running behind the scenes of many commercial video products.
For example, a basic command to resize a video to 1080x1920 while maintaining its aspect ratio by adding black bars (what we call letterboxing or pillarboxing) would look something like this:
ffmpeg -i input.mp4 -vf "scale=1080:1920:force_original_aspect_ratio=decrease,pad=1080:1920:(ow-iw)/2:(oh-ih)/2" output.mp4
This method is fast, scriptable, and gives you unmatched control, but it definitely has a steep learning curve. It’s best suited for developers or technical-minded creators who need to automate their video processing workflows. Manually crafting these commands can get tricky, especially when you need to crop and reframe rather than just pad the video with black bars.
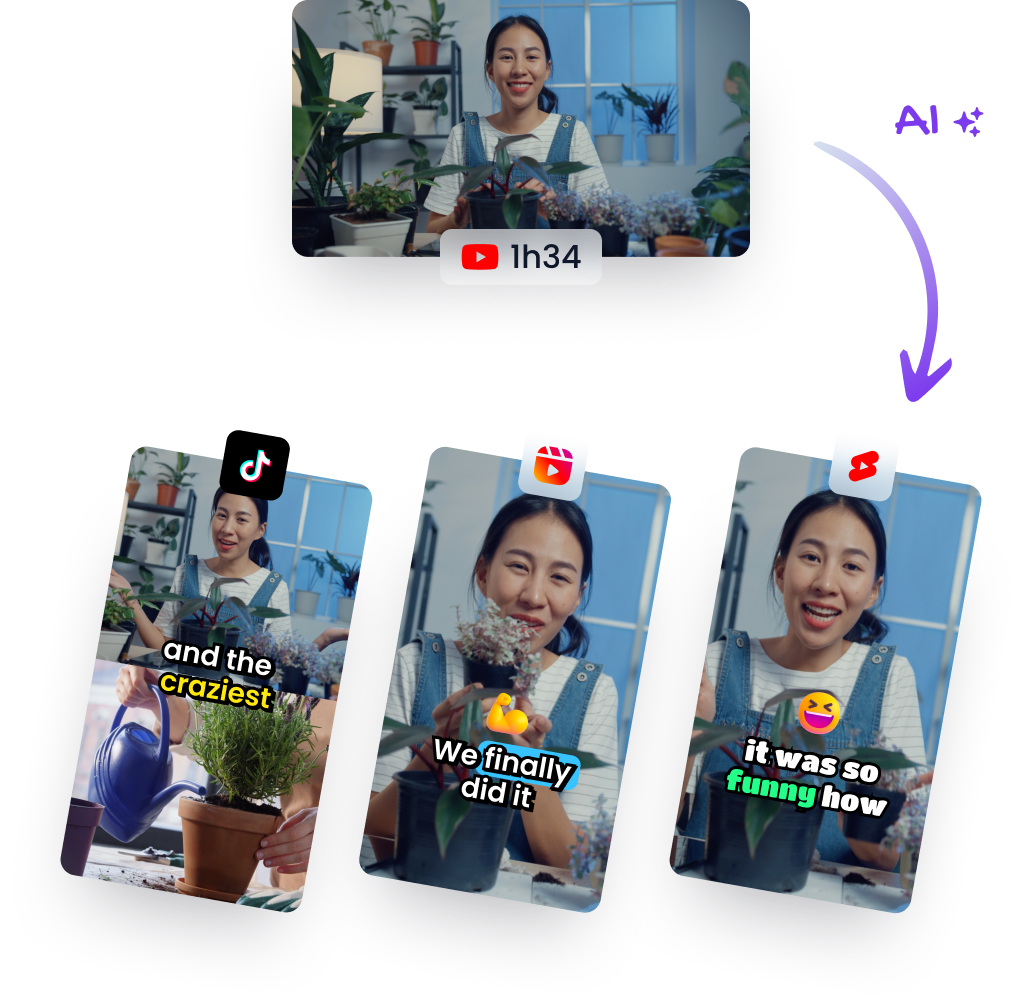
Using AI to Instantly Repurpose Your Videos
Manual methods give you control, sure, but let's be honest—they're a massive time sink. What if you could just skip the whole tedious process of cropping, scaling, and reframing? This is exactly where artificial intelligence comes in, offering a much smarter and faster way to change video dimensions and repurpose your content.
Instead of you hunting through a long video for the best moments, AI does the heavy lifting. Modern tools analyze your footage, pinpointing the most engaging clips that are actually likely to perform well as short-form content. It shifts the whole process from a manual chore to a strategic, automated workflow.
Beyond Resizing to Smart Repurposing
AI doesn’t just blindly chop your video into a 9:16 box. It intelligently reframes the shot to make sure the main subject—whether it's a speaker, a product, or an action sequence—stays perfectly centered. This feature, often called smart reframing or auto-reframe, is what really separates AI tools from your basic video resizer.
For example, platforms like Klap can take a single YouTube video and automatically:
- Identify Viral Moments: The AI scans the transcript and visual cues to find the most interesting hooks and compelling parts of your conversation.
- Resize and Reframe: It then converts these clips into a vertical 9:16 aspect ratio, dynamically keeping the speaker in focus even as they move around.
- Add Dynamic Captions: To boost engagement and make content more accessible, it automatically generates and styles captions that are easy to read on a phone.
This process turns one long-form asset into a dozen high-impact social media clips in minutes, not hours. It's a total shift in how creators can think about content distribution. You might find our guide on a top-tier AI short video generator useful for seeing this in action.
The Growing Impact of AI in Video
This move toward automated content creation isn’t just some niche trend; it’s quickly becoming the industry standard. The global AI video generator market is projected to skyrocket from $534.4 million in 2024 to $2,562.9 million by 2032. On top of that, nearly 57% of online ads now incorporate AI-generated video content, showing just how widespread it's become.
Actionable Insight: By using AI, you're not just saving time on changing video dimensions. You're tapping into a system designed to maximize your content's reach by identifying what will resonate most with a short-form audience.
This technology lets you test more ideas, post more often, and stay consistent across all your platforms without burning out. For creators, this means more time spent creating great primary content and less time bogged down in repetitive editing tasks. To explore specific tools that use artificial intelligence for video repurposing, you might want to check out Parakeet AI .
Ultimately, AI transforms repurposing from a tedious necessity into a powerful growth strategy.
How to Maintain Video Quality After Resizing
So you’ve changed your video’s dimensions, but now it’s a blurry, pixelated mess. It’s one of the most common frustrations when repurposing content, but it's totally avoidable once you understand what's happening behind the scenes.
Preserving video quality isn't about finding one magic setting. It’s all about managing data. Every video file is a delicate balance of pixels, compression, and information. When you resize a video, you're forcing the software to make educated guesses about how to rearrange all those pixels, and that can easily lead to a loss of detail.
Start With the Best Possible Source
The golden rule of video editing is simple: always start with the highest quality source file you have. You can always scale down in quality, but you can’t create detail that wasn’t there to begin with.
This is the classic "scaling down vs. scaling up" problem. When you scale down—say, from a 4K video to a 1080p vertical clip—the software has plenty of pixel information to work with. But when you try to scale up—like stretching a low-res 720p clip to fill a 1080p frame—the software has to invent pixels out of thin air. The result is that tell-tale blocky or fuzzy look we all hate.
Actionable Insight: Think of it like a photocopy. A copy of a copy will always look worse than one made from the original document. Your source video is your original—treat it like gold.
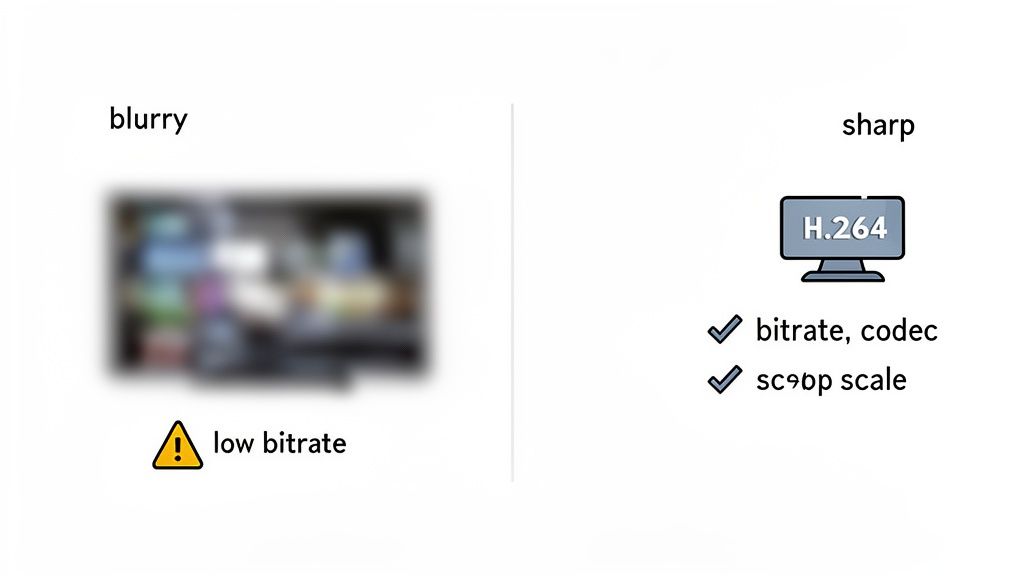
Understand Bitrate and Codecs
Beyond resolution, the two things that have the biggest impact on clarity are bitrate and codec. They sound technical, but the concepts are actually pretty straightforward.
- Bitrate is the amount of data used to encode one second of video. A higher bitrate means more data per second, which directly translates to a sharper, more detailed image. When you export your resized video, skimping on the bitrate is the fastest way to ruin its quality. For crisp 1080p video, a bitrate between 10-15 Mbps (megabits per second) is a great target.
- Codec is the technology used to compress and decompress your video file. The most common and widely supported codec out there is H.264 (also known as AVC). It offers an excellent balance of quality and file size, making it the standard for pretty much every social platform.
When you export your resized video, look for these settings. Don't just rely on default presets like "Medium Quality." Manually set your codec to H.264 and make sure the bitrate is high enough for your target resolution.
If you need a quick refresher on the best ways to frame your footage, check out our guide on how to crop video for social media . This simple check can make a world of difference in your final output, ensuring your content looks professional and polished.
Still Have Questions About Resizing Videos? Let's Clear Things Up
Even with the best tools, a few common questions always pop up when you start messing with video dimensions. Let's tackle the big ones so you can resize your stuff with total confidence.
Aspect Ratio vs. Resolution (Again, But Simpler)
I know we've covered this, but it's genuinely the number one thing that trips people up. Seriously, I get this question all the time.
Just think of it like a picture frame and the photo inside.
- Aspect Ratio is the shape of the frame itself. Is it a wide rectangle (16:9) for a TV, or a tall, skinny one (9:16) for a phone?
- Resolution is the amount of detail in the photo you put in that frame, measured in pixels (like 1920x1080).
When you change the aspect ratio, you're swapping the frame for a different shape, which usually means you have to crop the photo to make it fit. But if you only change the resolution, you’re just making the photo bigger or smaller inside the same frame.
For social media, you almost always need to change both.
Will I Lose Quality When I Resize My Video?
Yeah, you can. It’s a real risk, especially if you're trying to stretch a small, low-resolution video to fit a bigger frame. This is called upscaling, and it almost never looks good. The software is basically guessing what the missing pixels should be, and the result is usually a blurry mess.
To keep your video looking crisp, just follow two golden rules:
- Always start with the highest resolution video you have. You can't magically create detail that wasn't there to begin with.
- Export with a proper bitrate. Think of bitrate as the amount of data dedicated to your video's clarity. A higher bitrate means a sharper final product.
Actionable Insight: The most reliable way to maintain quality is to scale down from a larger resolution (like from 4K to 1080p), not the other way around.
How Do I Turn a Horizontal Video Vertical?
The goal here is simple: go from that wide 16:9 format to a tall 9:16 format without getting those ugly black bars on the top and bottom. That’s where reframing comes in.
You can't just drop your horizontal video in the middle of a vertical timeline. You have to punch in and actively crop the footage. The real art is keeping the most important part of the shot—the speaker, the action, whatever it is—centered in that new, taller frame.
Doing this manually in traditional editing software means painstakingly adjusting the position and scale for every single clip. It's a huge time sink.
This is where AI tools are a total game-changer. They use what’s often called “smart reframing.” The AI analyzes your footage, identifies the key subject (like a person's face), and automatically keeps it perfectly framed in the new vertical format. What used to take hours now takes seconds.
Ready to stop wasting time on manual editing and let AI do the heavy lifting? Klap turns your long-form videos into dozens of social-ready short clips in minutes, complete with smart reframing, viral topic detection, and dynamic captions. Turn your videos into viral shorts today with Klap .